
While applying abroad from India, you would have to prepare a Police Clearance Certificate (PPC). This process is initially done online, and it might be a little bit confusing for some people.
So, today, in this article, I would try to walk you through a step by step guide on how to prepare a Police Clearance Certificate in India from Online.
Registration and Login
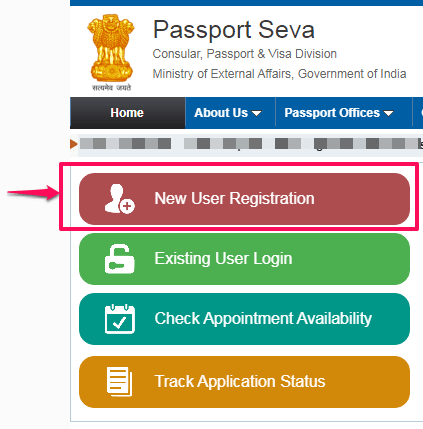
- Go to the official website of Passport India and click on new user registration.
Url: Passport India
2. When you click on new user registration, a form will come up.
Fill in the form with the correct details.
For the “register to apply at” option, select “Passport Office” and not the “CVP Delhi.”
When you finish filling up the form, click on register.
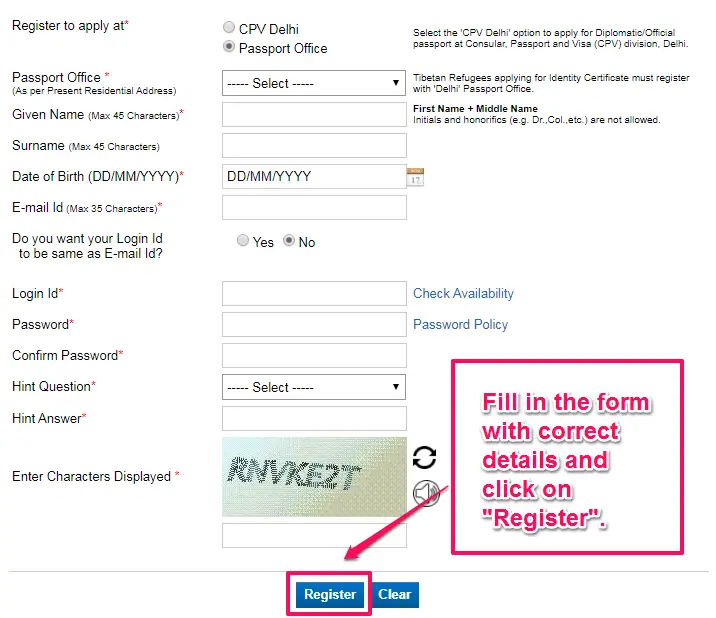
When you register, you will be told to verify your email account. Go to your email account and click the verification link.
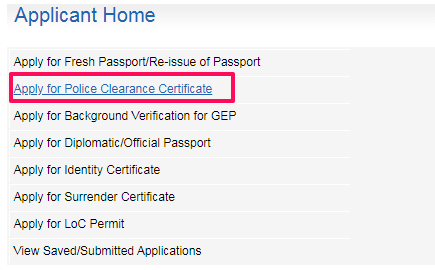
3. After that, you would be redirected to the Applicant home. There you will choose “Apply For Police Clearance Certificate.”
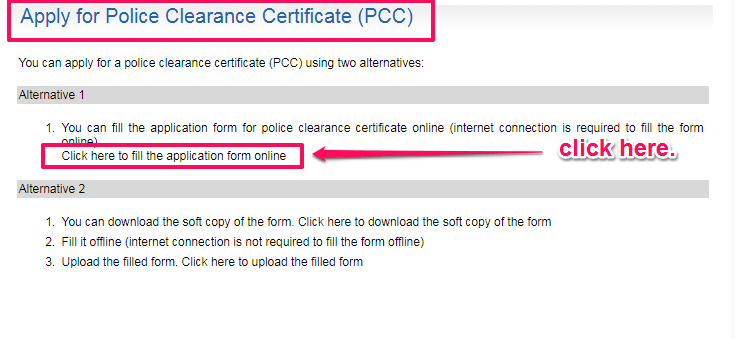
4. There are two alternatives to apply for PCC.
- Alternative 1:
You can fill the application form for a police clearance certificate online.
- Alternative 2:
You can download the soft copy of the form, fill it with details, and upload the filled form again to the site.
Alternative one is much easier, so we will be going with it.
Click on the link, as shown in the image below.
RPO Selection
You have to choose RPO by selecting the state and district where you want to submit your application.
If you are from Gujarat, you have to choose Gujarat as a state and Ahemdabad as a district if you are from Ahemdabad.
Passport Details

You have to put valid password details in the form and click next.
Double-check your details before clicking next.
Furnishing of incorrect information/suppression of information would lead to rejection of application and would attract penal provisions as prescribed under the Passports Act, 1967
Application Details
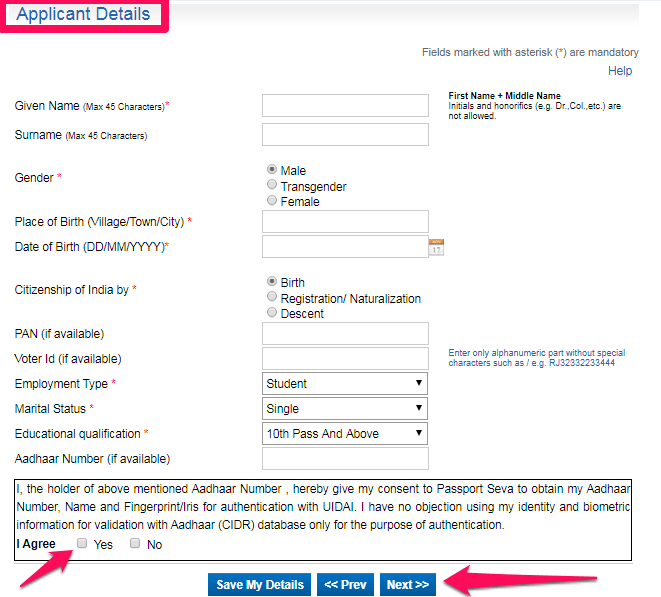
The form is self-explanatory. You won’t get confused while filling the form. Here is some guidance for you if you get stuck.
- Employment type: Student
- Marital status: single if you are single and select married if you are married
- Educational Qualification: If you are going for Bachelor studies, select 10th pass and above. If you are going for a master’s or Ph.D., choose graduate and above.
Aadhaar number should be correctly put as in your Aadhaar card.
Fill in the details and click on I agree and then click on next. Make sure your details are correct.
Family Details
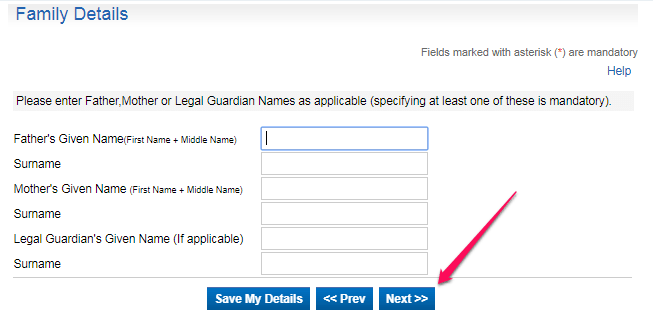
Enter your parent’s name or legal guardian’s name. Putting at least one of them is mandatory.
Click on next.
Present Residential Address
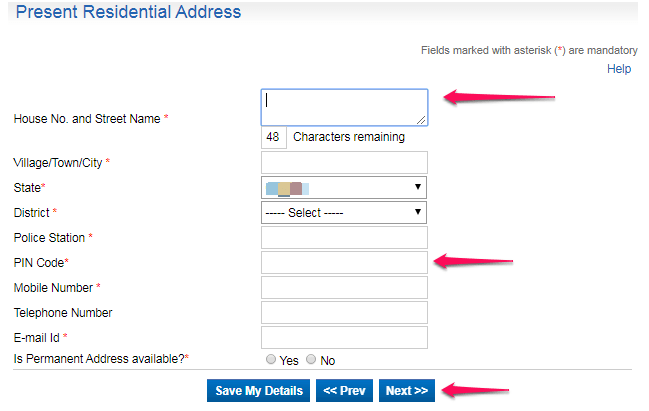
You have to fill in the form with your current address. Make sure you fill in the correct details of the following.
- House number and street name
- Police station
- Pin code
- Mobile number
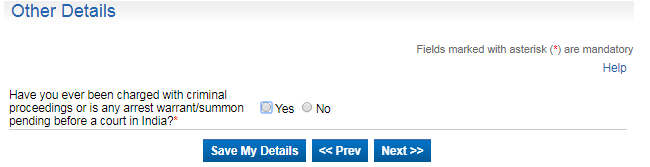
Other details
In other details, you will be asked whether you have even been in jail or called before a judge. This is to verify your criminal record.
If you have gone to jail or have any arrest warrants, then click on “Yes.”
If you haven’t, then click on “No.”
Self Declaration
It says:
“I owe allegiance to the sovereignty, unity, and integrity of India and have not voluntarily acquired citizenship or travel document of any other country. I have not lost, surrendered, or been deprived of the citizenship of India, and I affirm that the information given by me in this form and the enclosures are true, and I am solely responsible for its accuracy, and I am liable to be penalized or prosecuted if found otherwise. I am aware that under the Passports Act, 1967, it is a criminal offense to furnish any false information or to suppress any material information with a view to obtaining a passport or travel document.”
This means you are fully aware that the information you have submitted is correct and you would be solely responsible for its accuracy.
- Fill in the place name, date, and then click in, I agree.
- If you wish to get into passport Sewa service SMS, then click on yes if you don’t, then click on no.
- Click on the submit form.
Your form has been successfully submitted now.
Click on pay and schedule an appointment.
Choose Payment Method
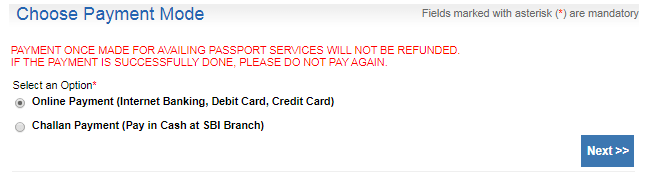
You have two options to pay for your documents.
- Online payment
- Internet Banking
- Debit Card
- Credit Card
It is an easy and fast process. You can get your PCC within a week from this process.
2. Challan Payment
- Pay in cash at SBI Branch
It might take up to 30 days for you to get your PCC with this method.
Choose whichever option fits you.
This payment isn’t refundable.
Schedule Appointment
You will be given the availability of the date and place for the appointment.
Select the preferable one, and click on next.
Pay and Book appointment
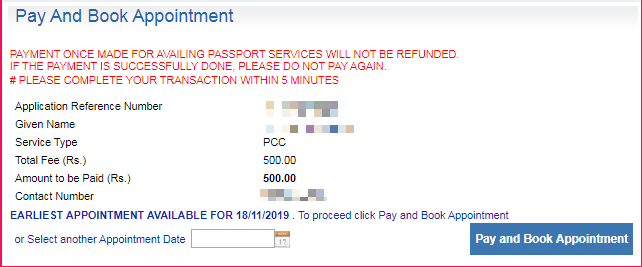
You have an appointment date now.
If you wish to choose another appointment date, then check the availability of the date.
If you are ok with the date, click on pay and book an appointment.
- You will be redirected to the website of SBI Bank. Make your payment, and you are done.
- Click the “Print Application Receipt” link to print the application receipt containing the Application Reference Number (ARN)/Appointment Number.
- They will give you a receipt. Make sure you keep it safe and bring it when going to the police station.
You just read step by step guide on how to get a police clearance certificate online in India. Was this article helpful?
If you have any questions, please let us know in the comment section below.
All the very best.
You may also like to read:
How to Apply Cyprus On A Student Visa From India? Cyprus Student visa requirements for India.
Why Choose Cyprus For Your Higher Studies?
How much can an international student earn in Cyprus?
Yes this is helpful thanks for this article
You are welcome Rajbir.
Good day, i’m a non national and i want to apply for india PCC But I’m currently in cyprus. How do i go about this? I’d appreciate your reply. Thank you